The admin Privilege
Starting with Version 1.0.0, there has been a major overhaul on how
privileges function within the application. Privileges are now tied to
user roles! This allows additional flexibility to manage a user’s
access. However, there is one privilege whose assignment is mandatory
for app deployment: the admin privilege. The
admin privilege is important (and required for at least one
user) because this person will manage the credentials and roles for all
other users. Though it can be changed, the default app configuration
gives admins access to all other privileges. To learn more
about the other privileges, further details are provided in the “User Roles and
Privileges” guide.
We’ll use this vignette to discuss the only
admin-specific privilege: credentials management. To verify
you have admin access, first check that you can see all THE
navigation tabs within the app, especially the rightmost
Administrative Tools tab.
If you do not see this tab, you have not been granted access! To gain
access, you’ll have to request access from a known admin
user within your organization.


You can also hover your cursor over the
symbol in the bottom-right corner of the page. Upon hovering, two
additional buttons should appear. The middle one is the log out
button, while the Administrator mode
button will appear on top, as shown. This button will not appear for
non-admin users.
Once you have selected the
Administrative Tools tab,
there are currently two areas available for review: the first is
Credential Manager and the second is
Roles & Privileges, as seen below. Note: you may also
see a tab labelled Assessment Reweighting, which is
connected to a different privilege which may be included in your
role.

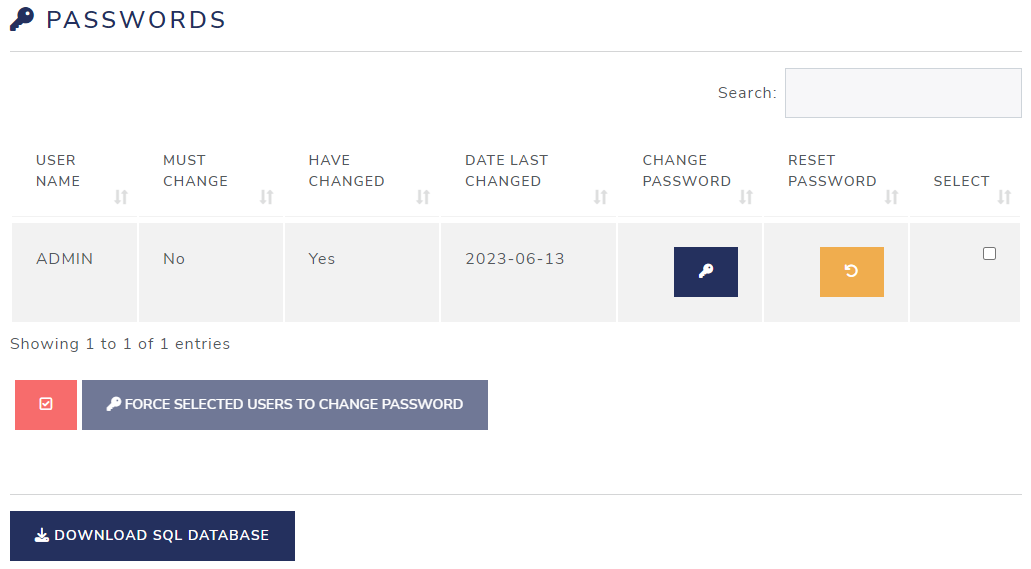
The Credential Manager
The Credential Manager tab is shown by default which contains two tables:
The first one, indicated by the Users icon, is used to manage users.
The the second one, indicated by the key icon, is used to manage passwords.
There is also a button at the bottom to download a copy of the current sqlite database.
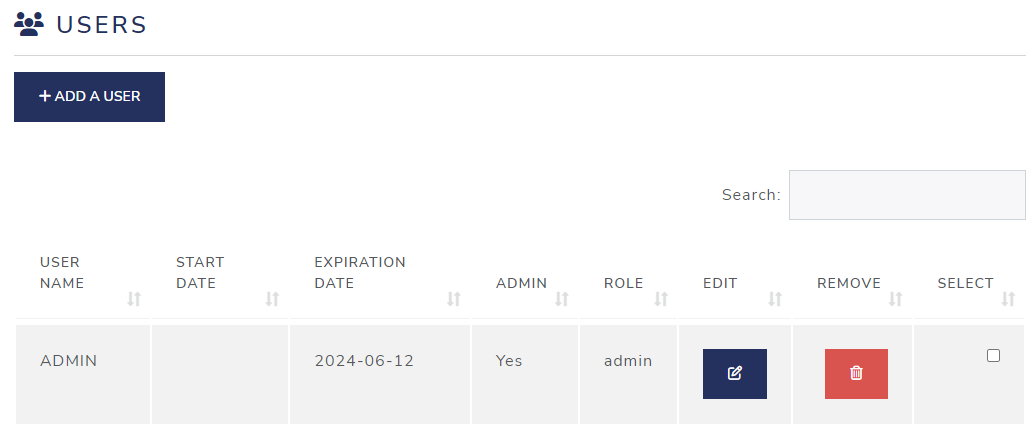
Managing Users
The first table provides tools for managing of users: adding, editing, and deleting.
Add a User
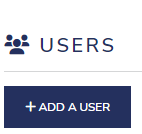
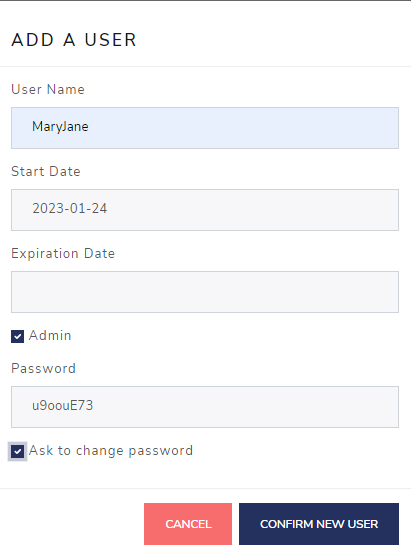
To add a new user, click the button labelled: “Add a user”.
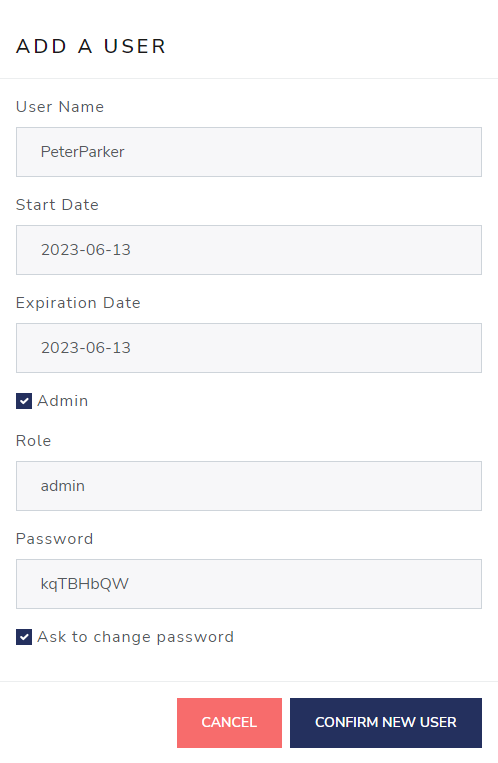
A prompt will appear where you can specify a user name, as well as optional start & expire date for that new member. By default set to today’s date (more on that later).
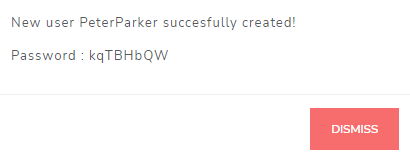
Here, we’ll type “PeterParker” into the User Name field.
Notice the checkbox to grant the new user administrator privileges is also checked by default. A unique password is generated which the user will be prompted to change the first time he/she logs on, as long as the “Ask to change password” box remains checked.
Upon clicking CONFIRM NEW USER, a confirmation modal will appear. Now would be a good time to notify the user by sending them their userid and temporary password.
User start and expire dates
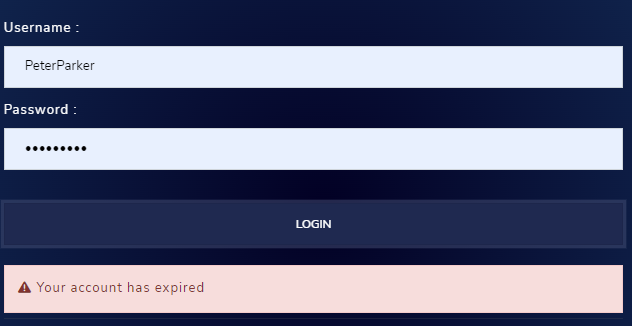
If either the start date is set to a future date or the expire date is set to before today’s date, an account expired message will appear, and the log-on attempt will fail.
Feel free to set either or both of these dates as needed, or just leave them blank to ignore/avoid time-based access for a particular user.
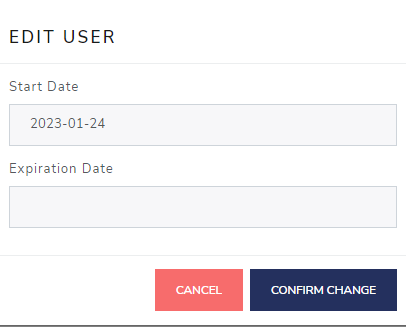
Edit a user
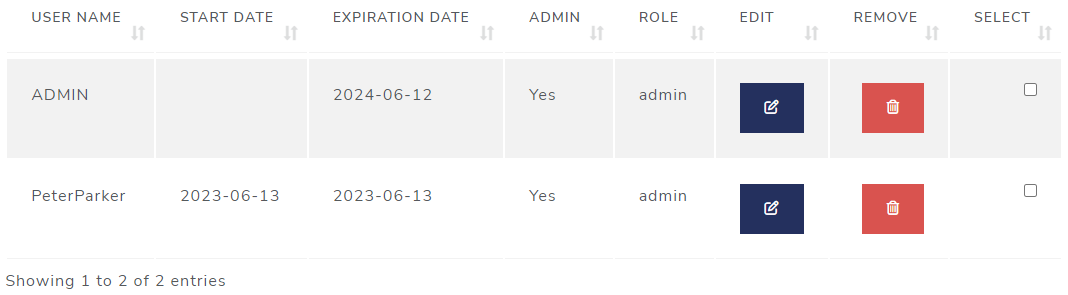
Edit user information by clicking on the EDIT button, found on the right-hand side of the table.
An Edit User window will appear:
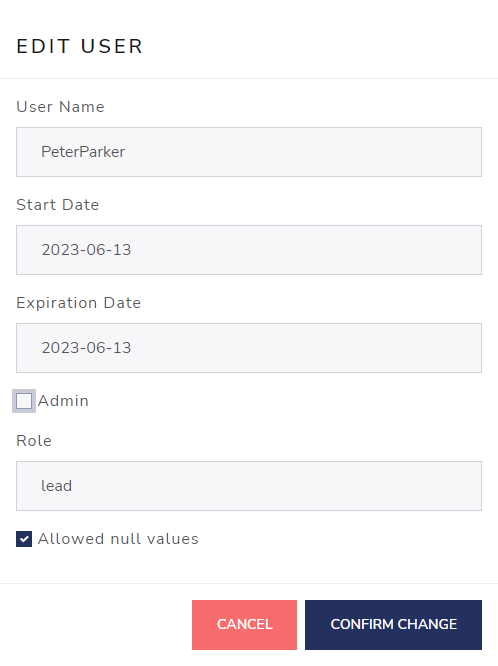
Make your changes, and then click on CONFIRM CHANGE.
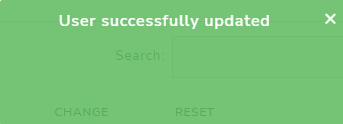
A small modal dialog box will appear (briefly) indicating the user has been successfully updated.
More Edit options
At the bottom of this table is a bar with three buttons:

The first one is a checkbox to select multiple users followed by an EDIT SELECTED USERS and a REMOVE SELECTED USERS button. These buttons are enabled when you select two or more users.
Note the “Edit Selected Users” button only allows you to modify the
start and expire dates for that selected group
of users.
After you’ve made your changes, click CONFIRM CHANGE.
Again, a small modal dialog box will briefly appear indicating the users have been updated.
Delete a user
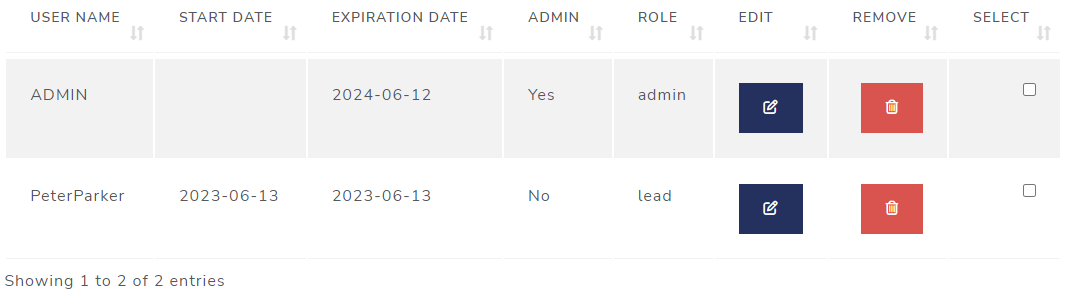
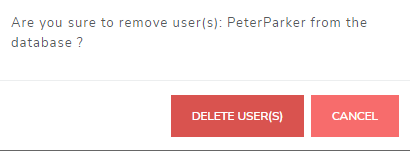
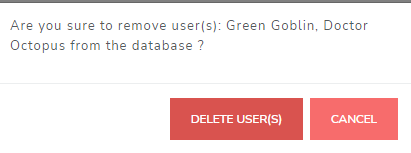
Delete any user by clicking on the REMOVE button on the right-hand side of the table. You will see a confirmatory modal dialog box. Click on “Delete User(s).”
You can also delete multiple users like you did with editing multiple users. Just click on the REMOVE SELECTED USERS button at the bottom of the table.
The same confirmatory modal dialog box will appear. Click on DELETE USER(S).
Replace initial admin user
As an administrator, it’s recommended you replace the initial
admin user ID created the first time the app is launched.
Note that there must always be at least one admin user,
and you cannot delete yourself! If you want to delete
the initial admin user you will first need to create
another user ID with administrative privileges, as described below.
Just as before, click the “Add a user” button and make sure to check
the Admin box. The temporary password can be overridden by
un-checking the “ask to change password” box and setting the password to
whatever you want.
After completing the form, sign in using your new credentials and
delete the original admin user by clicking on the
REMOVE button on that row of
the table.
Managing Passwords
The second table allows for password management.
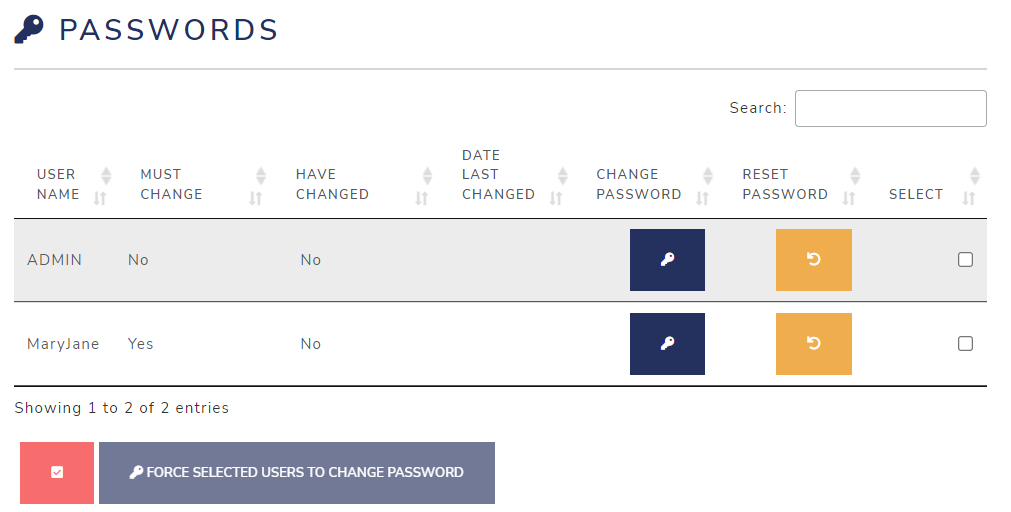
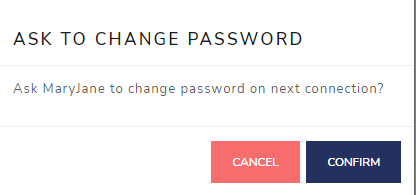
Click on the CHANGE PASSWORD button to force the corresponding user to change his/her password on the next log-in.
A confirmatory modal dialog box will appear, like this:
If you click on the RESET PASSWORD button to generate a temporary password.
Again, a confirmatory modal dialog box will appear, like this:
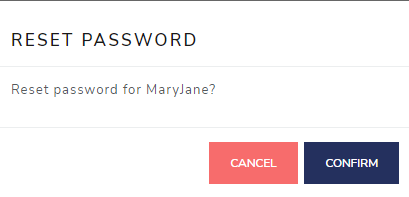
Click on CONFIRM and you will see another modal dialog box with the new temporary password in it.

You are responsible for delivering the new temporary password to the user.
As on the bottom of the User table, There is also a checkbox to select multiple users followed by a FORCE SELECTED USERS TO CHANGE PASSWORD button. This button is enabled when you select two or more users.
