Administrative Tools and Options
Source:vignettes/Administrative_Tools_and_Options.Rmd
Administrative_Tools_and_Options.RmdIntroduction
It’s no secret that users with administrator privileges have access
to certain features of the application. This guide assists
ADMIN users to manage these privileges, which (at a
minimum) include:
- govern user credentials
- re-weight metrics that determine how risk scores are calculated
- define automated decision rules based on those risk scores
To verify if you have ADMIN access, first check that you
can see all THE navigation tabs within the app, especially the rightmost
Administrative Tools tab.
If you do not see this tab, you have not been granted access! To gain
access, you’ll have to request access from a known ADMIN
user within your organization.


You can also hover your cursor over the
symbol in the bottom-right corner of the page. Upon hovering, two
additional buttons should appear. The middle one is the log out
button, while the Administrator mode
button will appear on top, as shown. This button will not appear from
non-ADMIN users.
Once you have selected the
Administrative Tools tab,
there are currently two areas available for review: the first is
Credential Manager and the second is
Assessment Reweighting, as seen below.

Credential Manager
The Credential Manager tab is shown by default which contains two tables:
The first one, indicated by the Users icon, is used to manage users.
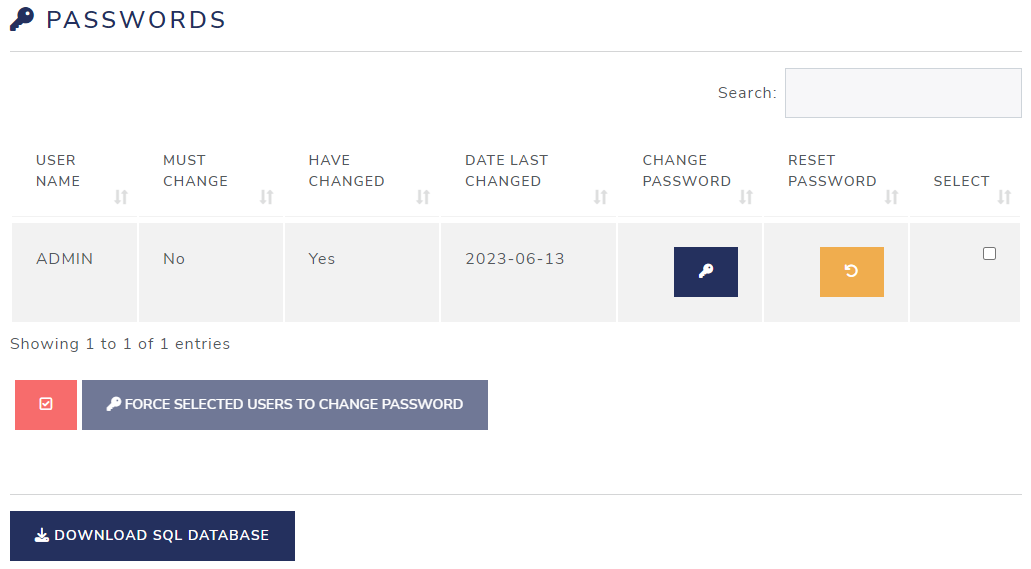
The the second one, indicated by the key icon, is used to manage passwords.
There is also a button at the bottom to download a copy of the current sqlite database.
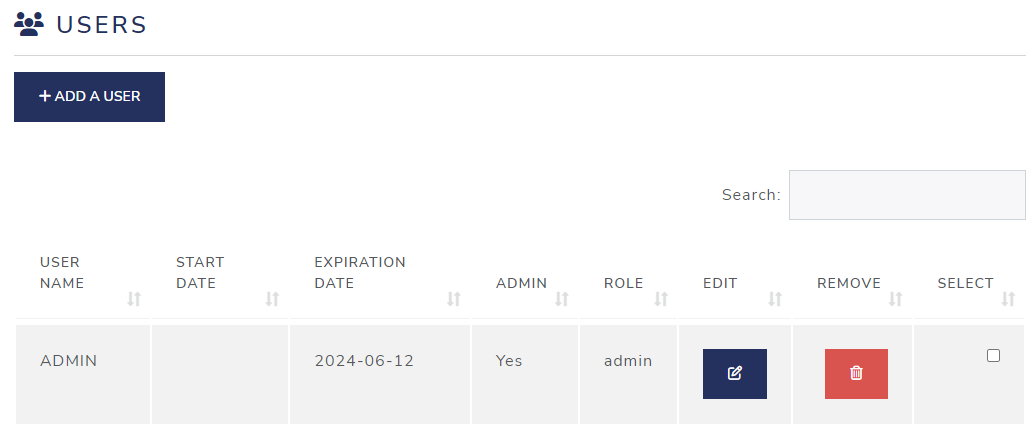
Managing Users
The first table provides tools for managing of users: adding, editing, and deleting.
Add a User
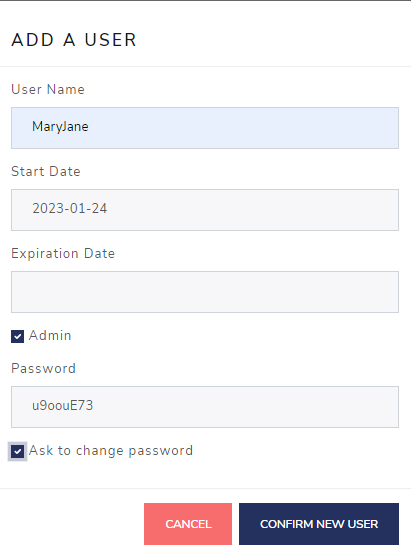
To add a new user, click the button labelled: “Add a user”.
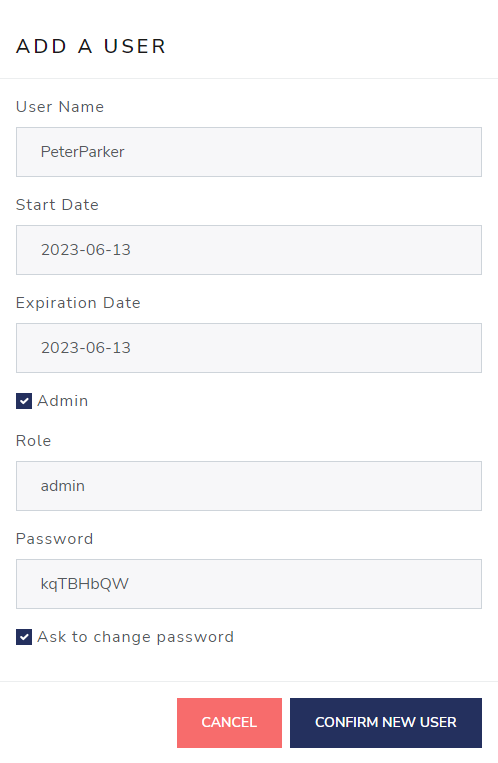
A prompt will appear where you can specify a user name, as well as optional start & expire date for that new member. By default set to today’s date (more on that later).
Here, we’ll type “PeterParker” into the User Name field.
Notice the checkbox to grant the new user administrator privileges is also checked by default. A unique password is generated which the user will be prompted to change the first time he/she logs on, as long as the “Ask to change password” box remains checked.
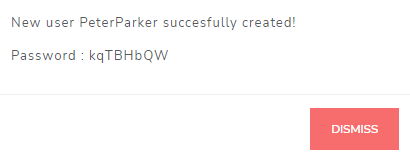
Upon clicking CONFIRM NEW USER, a confirmation modal will appear. Now would be a good time to notify the user by sending them their userid and temporary password.
User start and expire dates
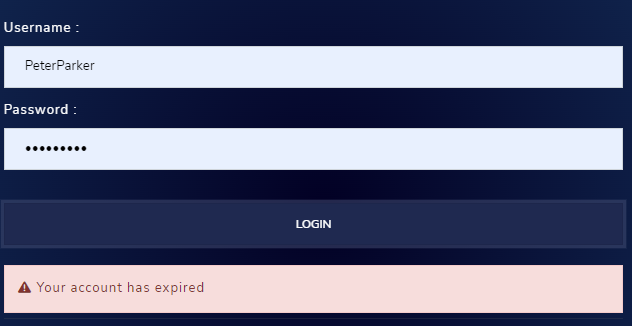
If either the start date is set to a future date or the expire date is set to before today’s date, an account expired message will appear, and the log-on attempt will fail.
Feel free to set either or both of these dates as needed, or just leave them blank to ignore/avoid time-based access for a particular user.
Edit a user
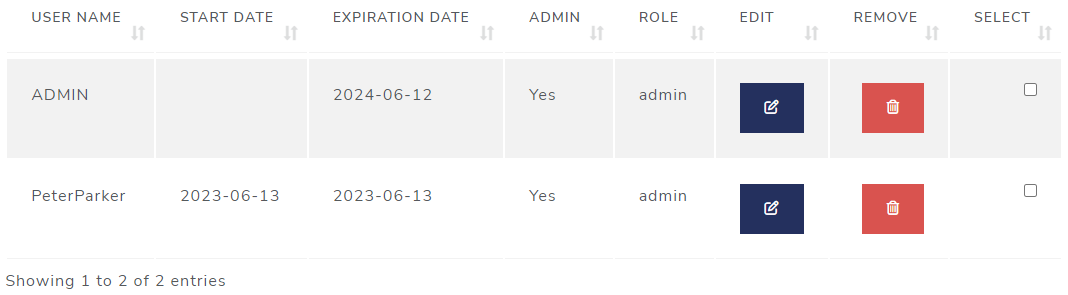
Edit user information by clicking on the EDIT button, found on the right-hand side of the table.
An Edit User window will appear:
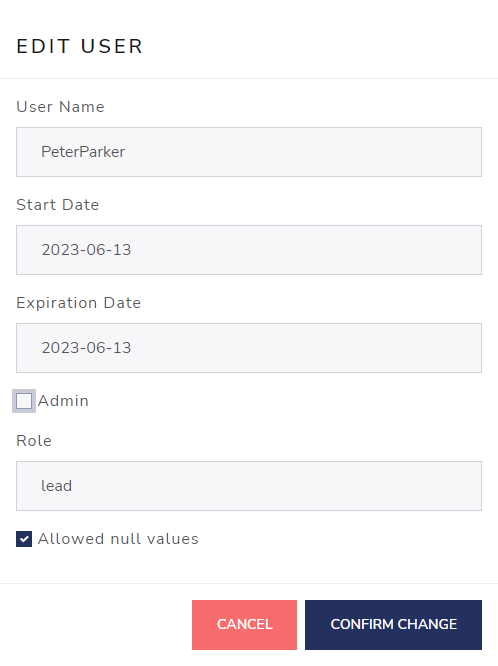
Make your changes, and then click on CONFIRM CHANGE.
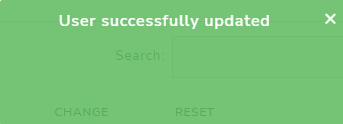
A small modal dialog box will appear (briefly) indicating the user has been successfully updated.
More Edit options
At the bottom of this table is a bar with three buttons:

The first one is a checkbox to select multiple users followed by an EDIT SELECTED USERS and a REMOVE SELECTED USERS button. These buttons are enabled when you select two or more users.
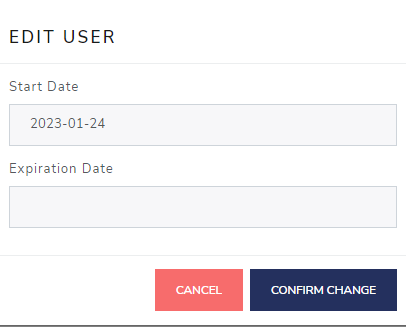
Note the “Edit Selected Users” button only allows you to modify the
start and expire dates for that selected group
of users.
After you’ve made your changes, click CONFIRM CHANGE.
Again, a small modal dialog box will briefly appear indicating the users have been updated.
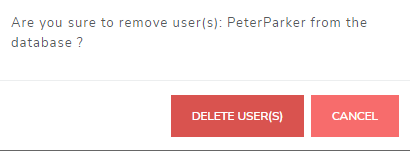
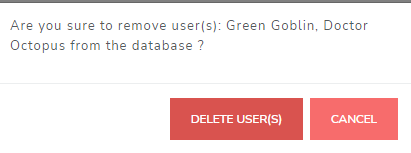
Delete a user
Delete any user by clicking on the REMOVE button on the right-hand side of the table. You will see a confirmatory modal dialog box. Click on “Delete User(s).”
You can also delete multiple users like you did with editing multiple users. Just click on the REMOVE SELECTED USERS button at the bottom of the table.
The same confirmatory modal dialog box will appear. Click on DELETE USER(S).
Replace initial Admin user
As an administrator, it’s recommended you replace the initial
ADMIN user ID created the first time the app is launched.
Note that there must always be at least one admin user,
and you cannot delete yourself! If you want to delete
the initial admin user you will first need to create
another user ID with administrative privileges, as described below.
Just as before, click the “Add a user” button and make sure to check
the Admin box. The temporary password can be overridden by
un-checking the “ask to change password” box and setting the password to
whatever you want.
After completing the form, sign in using your new credentials and
delete the original ADMIN user by clicking on the
REMOVE button on that row of
the table.
Managing Passwords
The second table allows for password management.
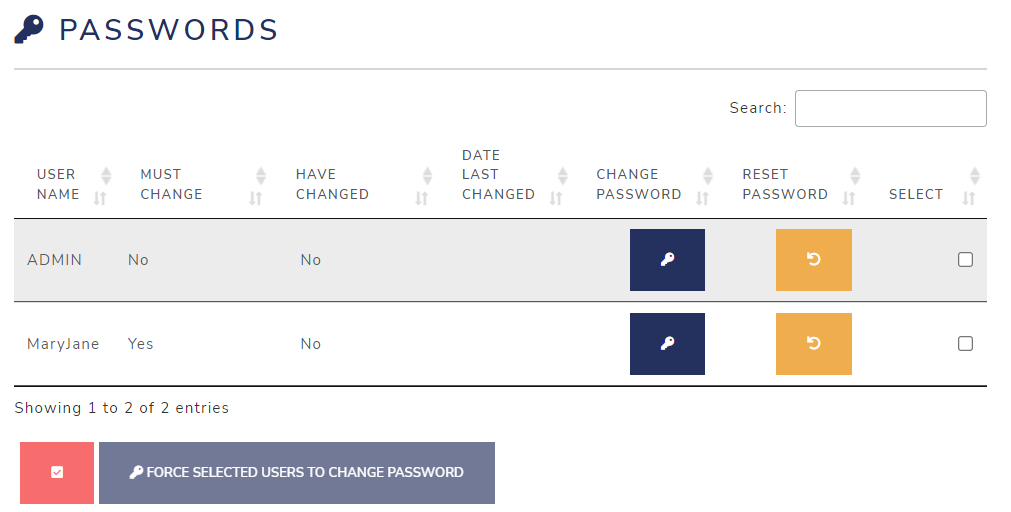
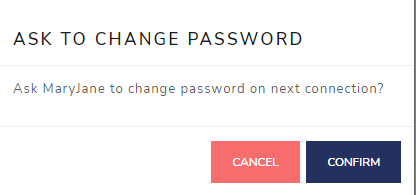
Click on the CHANGE PASSWORD button to force the corresponding user to change his/her password on the next log-in.
A confirmatory modal dialog box will appear, like this:
If you click on the RESET PASSWORD button to generate a temporary password.
Again, a confirmatory modal dialog box will appear, like this:
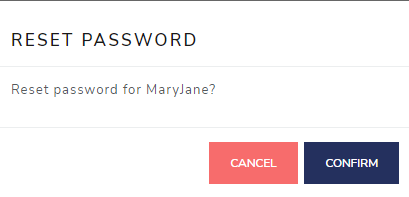
Click on CONFIRM and you will see another modal dialog box with the new temporary password in it.

You are responsible for delivering the new temporary password to the user.
As on the bottom of the User table, There is also a checkbox to select multiple users followed by a FORCE SELECTED USERS TO CHANGE PASSWORD button. This button is enabled when you select two or more users.

Assessment Reweighting
Head over to the other tab available to ADMIN users
called Assessment Reweighting. Here is a high level
view:
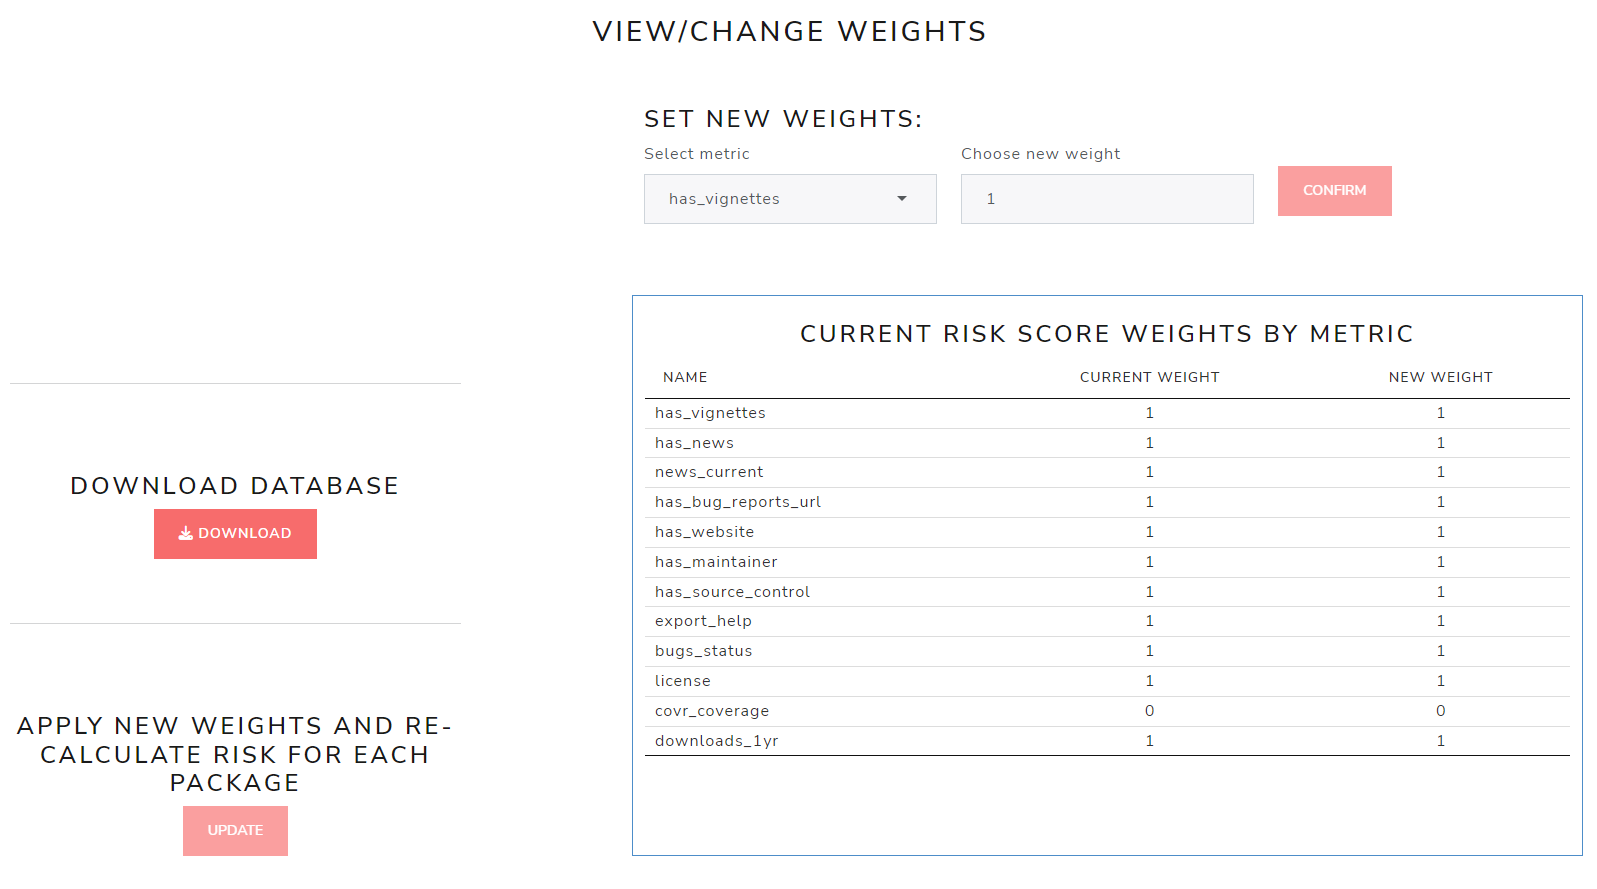
There are three buttons on this page: UPDATE WEIGHT on the top right, DOWNLOAD on the middle left, and RE-CALCULATE on the bottom left.
Download Database
First, the simplest: the DOWNLOAD database button.
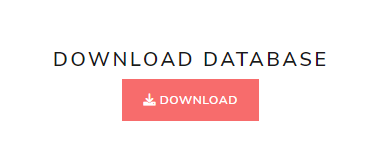
When clicked, this button will download a copy of the current database (by default, called “database.sqlite”). The app developers recommend doing this anytime you plan to make integral changes to the database (like changing metric weights), before anything else.
Updating Weights
As the name suggests, this modules allows to us view existing and
change metric weights used to calculate a risk score using
riskmemtric.

Here you can either select a metric from the
Select metric dropdown box or select a row in the
“CURRENT RISK SCORE WEIGHTS BY METRIC” table.
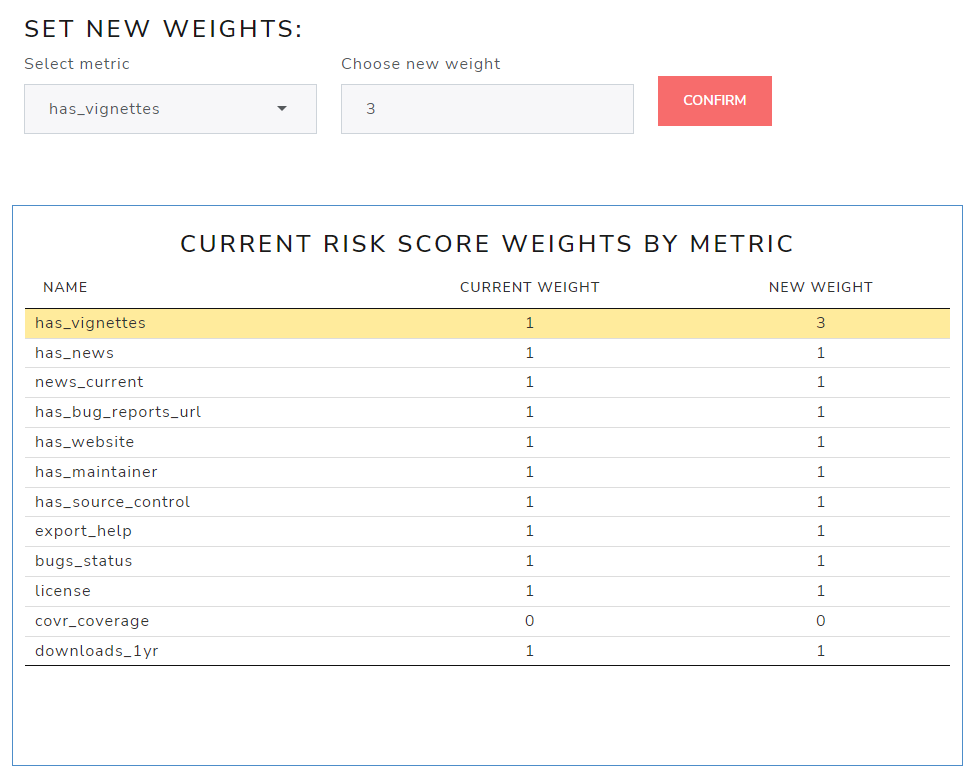
Once the metric is selected, enter a new (numeric) weight in the “Choose new weight” box and select the UPDATE WEIGHT button. You’ll notice the row with the change will appear highlighted, showing you the old weight value and the new weight value:
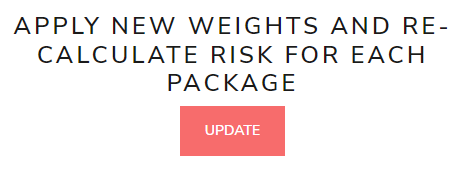
After you have updated at least one metric weight, the RE-CALCULATE button is enabled, allowing you to apply new weights and re-calculated the risk for each package.
After you’ve made all final re-weighting changes, you can click the “Re-calculate” button pictured here. Note that these weight changes will take effect on all packages in the database, updating the risk score for each.
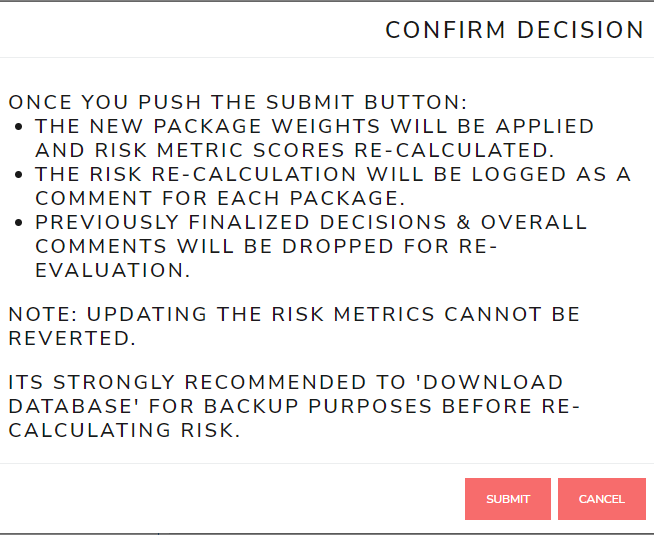
Once you click on RE-CALCULATE you will get a confirmation modal, reminding you that “updating the risk metrics cannot be reverted”, and strongly recommending you download a copy of the current database first before clicking on SUBMIT. The modal also details all the actions that will take effect in the app if you submit these changes.
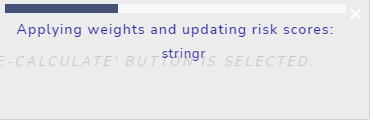
Once you click on SUBMIT a modal dialog box will appear indicating that it is applying weights and updating risk scores to each package you have uploaded. This will be followed by a brief “updates completed” message.
Now go to the database overview tab to confirm that the risk scores
have been updated. You can also view the new weights, including the
standardized weight on the Assessment Criteria tab.
Decision Automation
If your organization has black and white rules about package risk
decisions based solely on riskmetric scores, then decision
automation is for you. When leveraged, it will help you automatically
classify packages into the “Low”, “Medium”, or “High” risk decision
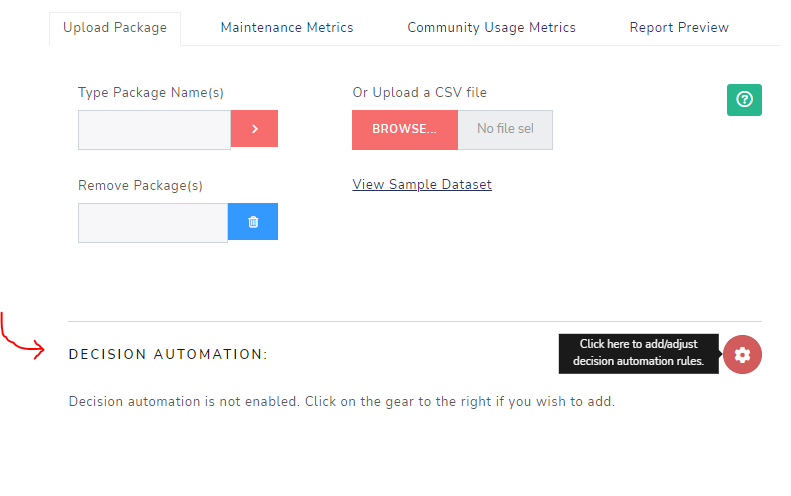
categories upon upload. The current automation rules are always
displayed on the ‘Upload Package’ tab. Please note that only
ADMIN users have the necessary privileges to edit. To get
started, click on the small
(gear) button in the upper right hand corner of that section.
If there are no decision rules applied, you’ll see the following risk decision categories next to empty check boxes. When setting up these rules for your organization, you can choose as much or as little automation as needed.
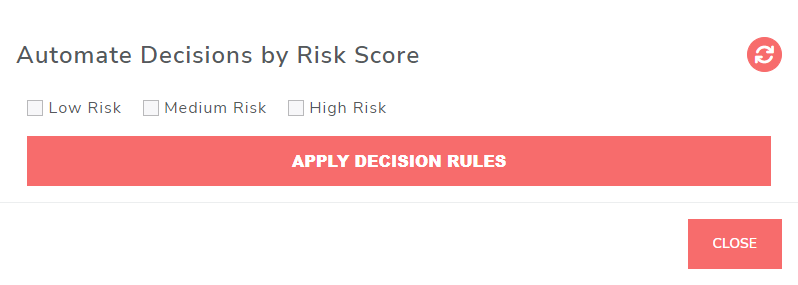
For example, if you only want to set up an automatic decision for “High” risk scores, you only need to select that check box and make your risk score designation / cut off value. Every time a package is uploaded with a risk score > 0.66, it will automatically receive the decision label: “High” which saves your review team time and mental capacity when reviewing large groups of packages.

Similarly, if you have package risk thresholds mapped out for each decision category, then apply them here! The user interface won’t allow the slider ranges to overlap, but it will allow gaps between each range. In the example below, we adopt automatic decisions for packages with risk scores less than 0.33 and greater than .66. In this fictitious example, let’s say our organization has a policy that any package whose risk score falls between 0.33 and 0.66 will need to be reviewed manually.

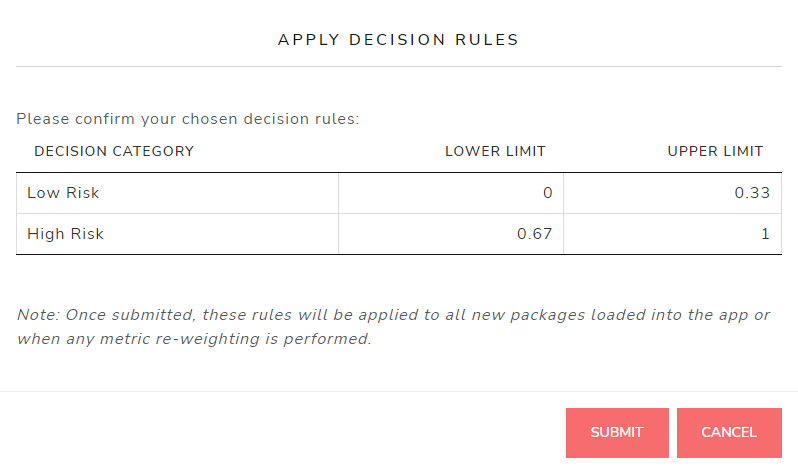
To apply these changes, your ADMIN will need to select
APPLY DECISION RULES. A pop-up
will ask the user to review and confirm the selected automation
rules:
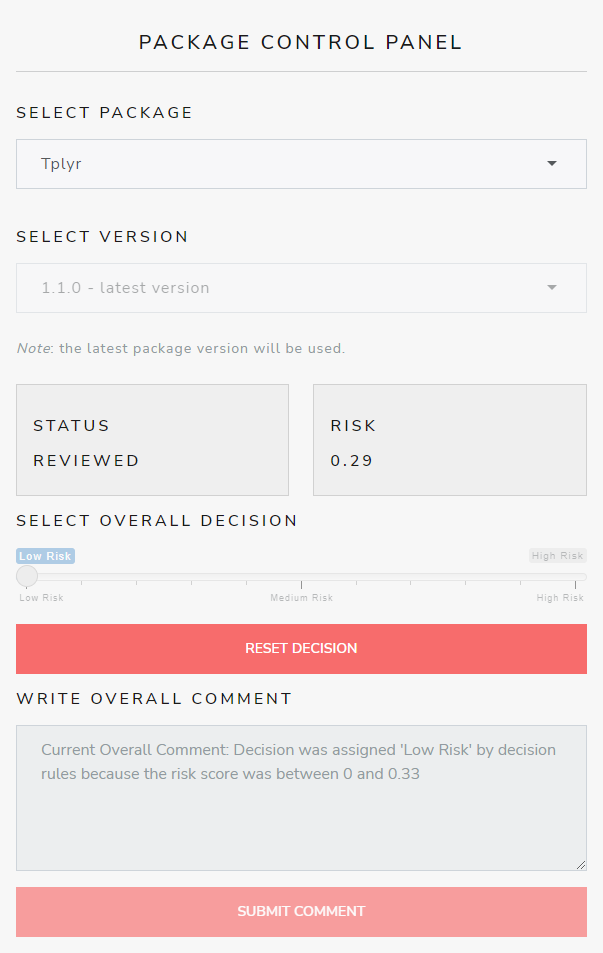
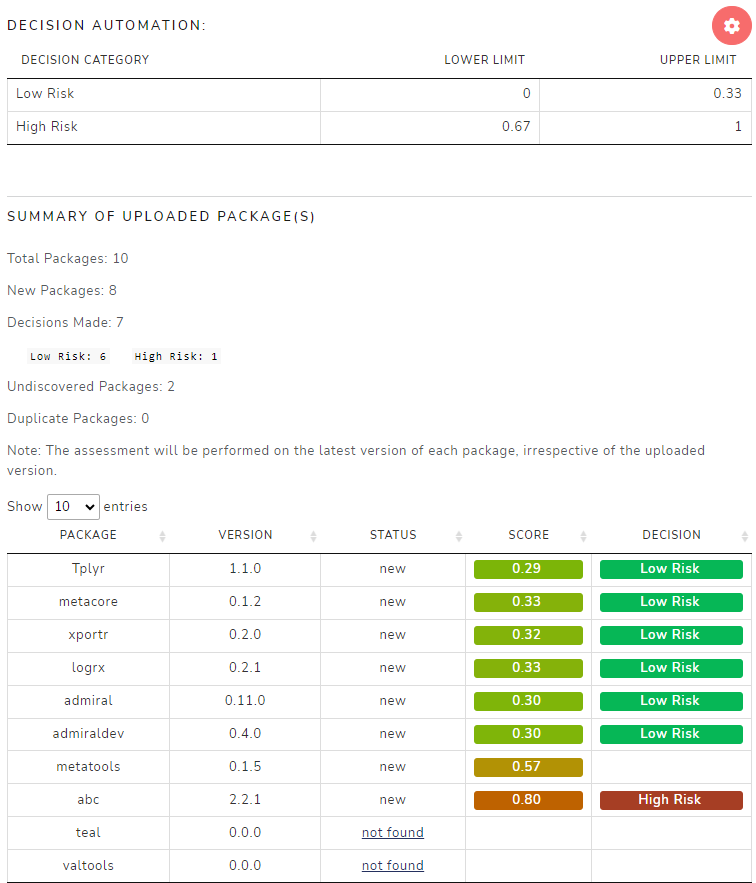
Upon clicking submit, the automation rules will be stored for all users to see on the ‘Upload Package’ tab. After uploading a new CSV of packages, you can see the ‘Summary of Uploaded Package(s)’ that now includes a summary of decisions made, and in each category. In the example below, you can see that 10 packages were uploaded, and 5 automatic decisions were made: four received the “low” designation and one was labeled as “high” risk. In the summary table, the risk score and decision on the right-hand side. You can also observe that a few packages weren’t found because they don’t exist on CRAN.
Consulting the ‘PACKAGE CONTROL PANEL’, if we select one of the packages where a decision was made, you can see that the ‘Status’ has been changed to “Reviewed” and the risk decision slider has been adjusted accordingly and disabled. In addition, an ‘Overall Comment’ was submitted, stating that the decision made was driven via the automation rules.